As a first step, we will be installing a Python distribution and getting things set up. As this is aimed at non-computer science students and a broader audience, we will assume that you have no prior experience with Python or programming, and that you are using a Windows machine of some kind. Steps will differ if you are using a Mac or Linux machine, but the general idea is the same.
What is Python and how do you get it running?
Python is a high-level programming language that is widely used in data science, machine learning, and other development areas. It is known for its simplicity and readability, and is a great language to start with if you are new to programming. Python comes in various distributions, but the most popular one is Anaconda, which is a free and open-source distribution that includes many of the most popular Python libraries for data science and machine learning.
In this tutorial, we will walk you through the steps to install Anaconda on your Windows machine, and get you set up with Python so you can start coding.
Getting Anaconda
To get started, you will need to download the Anaconda distribution from the official website. You can find the download link here. Make sure to download the version that is compatible with your operating system (Windows, Mac, or Linux).
Once you have downloaded the installer, double-click on it to start the installation process. You will be presented with a series of screens that will guide you through the installation. Make sure to read each screen carefully and follow the instructions.
Making sure it works
Once the installation is complete, you can open the Anaconda Navigator from the Start menu. This will open a window that will allow you to launch JupyterLab, which is a web-based interactive development environment for Python. You can use JupyterLab to write and run Python code, create visualizations, and share your work with others. You also want to make sure that you can run Python from the command line. To do this, open the Anaconda Prompt from the Start menu and type python. You should see a Python prompt that looks something like this (the version number may vary):
Python 3.8.5 (default, Sep  4 2020, 07:30:14) [MSC v.1916 64 bit (AMD64)] :: Anaconda, Inc. on win32
Type "help", "copyright", "credits" or "license" for more information.
>>>
If you see this prompt, then Python is installed and working correctly on your machine. You can now start writing and running Python code!
Alternative Python distributions
While Anaconda is the most popular Python distribution for data science and machine learning, there are other distributions available as well. Some of the other popular distributions include:
- Python.org: The official Python website, where you can download the standard Python distribution.
- Miniconda: A minimal installer for conda, which is a package manager that is used by Anaconda.
- WinPython: A portable distribution of Python for Windows that includes many of the popular Python libraries.
Each of these distributions has its own advantages and disadvantages, so you may want to explore them further to see which one is best for your needs. However in general, Anaconda is the most popular choice, so it is a good place to start if you are new to Python.
Your first Python program
Now that you have Python installed on your machine, let’s write your first Python program. In your Anaconda Prompt, type python to start the Python interpreter, and then type the following code:
print("Hello, World!")Press Enter to run the code, and you should see the following output:
Hello, World!Congratulations! You have just written and run your first Python program. This is a simple program that prints the text “Hello, World!” to the screen. You can now start exploring the Python language further and writing more complex programs.
Using Python libraries
One of the great things about Python is that it has a large number of libraries that you can use to extend its functionality. These libraries provide pre-written code that you can use in your programs to perform various tasks. Some of the most popular libraries for data science and machine learning include:
- NumPy: A library for numerical computing that provides support for large, multi-dimensional arrays and matrices.
- Pandas: A library for data manipulation and analysis that provides data structures like DataFrames and Series.
- Matplotlib: A library for creating visualizations like charts and graphs.
- Scikit-learn: A library for machine learning that provides tools for classification, regression, clustering, and more.
Anaconda comes with many of these libraries pre-installed, so you can start using them right away. To import a library in your Python program, you can use the import statement. For example, to import the NumPy library, you can use the following code:
import numpy as npThis will import the NumPy library and give it the alias np, so you can refer to it as np in your code. You can then use the functions and classes provided by the library to perform various tasks. Here’s an example of how you can use NumPy to create a simple array:
import numpy as np

arr = np.array([1, 2, 3, 4, 5])
print(arr)
Throughout this tutorial, we will be using various Python libraries to perform different tasks, so make sure to familiarize yourself with them and how to use them in your programs. You will see lots of the above import statements in the code examples, so it is important you understand what libraries are and what they are for.
Writing Python code in JupyterLab
Everyone prefers to write Python code in a more interactive environment, for that you can use JupyterLab. Get started by opening the Anaconda Navigator from the Start menu, and click on the JupyterLab icon. This will open a new tab in your web browser with the JupyterLab interface. You can create a new notebook by clicking on the New button and selecting Python 3. This will open a new notebook where you can write and run Python code.
JupyterLab is a great tool for writing and running Python code, as it allows you to write code in cells and run them individually. This makes it easy to test and debug your code, and to create interactive visualizations and reports. You can also add text, images, and other content to your notebook to create a complete document that you can share with others.
If you install jupyterlab-lsp, JupyterLab also supports code completion, syntax highlighting, and other features that make it easier to write Python code. You can use the Tab key to autocomplete code, and the Shift + Enter key to run a cell. You can also use the Ctrl + Enter key to run a cell and keep the focus on it, which is useful for testing and debugging code.
Jupyter and Markdown
Jupyter supports a feature called Markdown, which allows you to write formatted text, images, and other content in your notebook. Markdown is a lightweight markup language that is easy to learn and use, and it is a great way to add structure and style to your notebook. You can use Markdown to create headings, lists, tables, links, and more, and to format text in bold, italic, and other styles.
To use Markdown in a Jupyter cell, you need to change the cell type from Code to Markdown. You can do this by clicking on the cell and selecting Markdown from the dropdown menu at the top of the notebook. You can then type your Markdown content in the cell, and run the cell to see the formatted output. Here are some examples of Markdown syntax that you can use in your notebook:
- Headings: Use
#to create headings of different levels, like# Heading 1,## Heading 2, and so on. - Lists: Use
*or-to create bulleted lists, and1.,2., and so on to create numbered lists. - Links: Use
[link text](url)to create links to websites or other content. - Images: Use
to display images in your notebook. - Bold and italic text: Use
**bold text**to create bold text, and*italic text*to create italic text.
Markdown is a powerful tool that you can use to create rich and interactive content in your Jupyter. You can use it to create reports, tutorials, presentations, and more, and to share your work with others in a clear and engaging way.
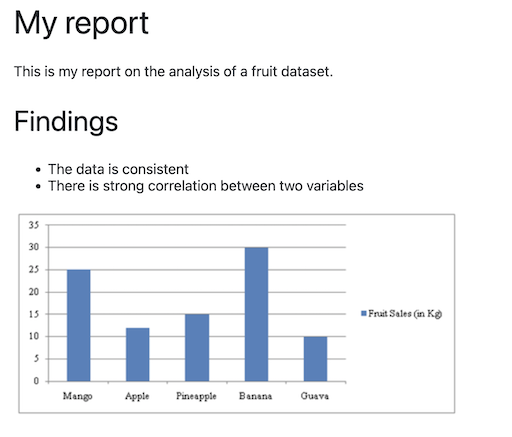
Here’s an example of how you can use Markdown to create a simple report in a Jupyter notebook:
# My report
This is my report on the analysis of a fruit dataset.
## Findings
* The data is consistent
* There is strong correlation between two variables
Which would then render and look like this:
You can learn more about Markdown syntax and how to use it in your Jupyter by referring to the official Markdown guide.